How to Install Audi A4/S4/RS4 B8 2008–2016 10-Inch Screen Radio Upgrade with CarPlay & DAB

If you own an Audi A4, S4, or RS4 B8 (2008-2016) and want to modernize your infotainment, upgrading to a 10-inch Android touchscreen radio brings Apple CarPlay, Android Auto, built-in GPS navigation, DAB+ radio (where supported), Bluetooth, USB media, and more. This comprehensive guide walks you through the features, compatibility checks, installation steps, and tips to get the best result.
Where to Buy
You can buy the unit here:
“Introducing our latest aftermarket GPS navigation head unit, designed specifically to replace the factory radio system in the Audi A4 S4 RS4 B8 2008-2016… With the same wiring harness and plug as the original radio, it's a simple plug-and-play installation.”
Why Upgrade Your Audi’s Factory System?
Many B8 Audis came with outdated MMI systems that lack smartphone connectivity, touchscreen navigation, modern audio features, and DAB digital radio support. Replacing the factory screen with this Android-powered head unit brings a huge tech boost — while still retaining original factory FM/CD functions and many OEM features.
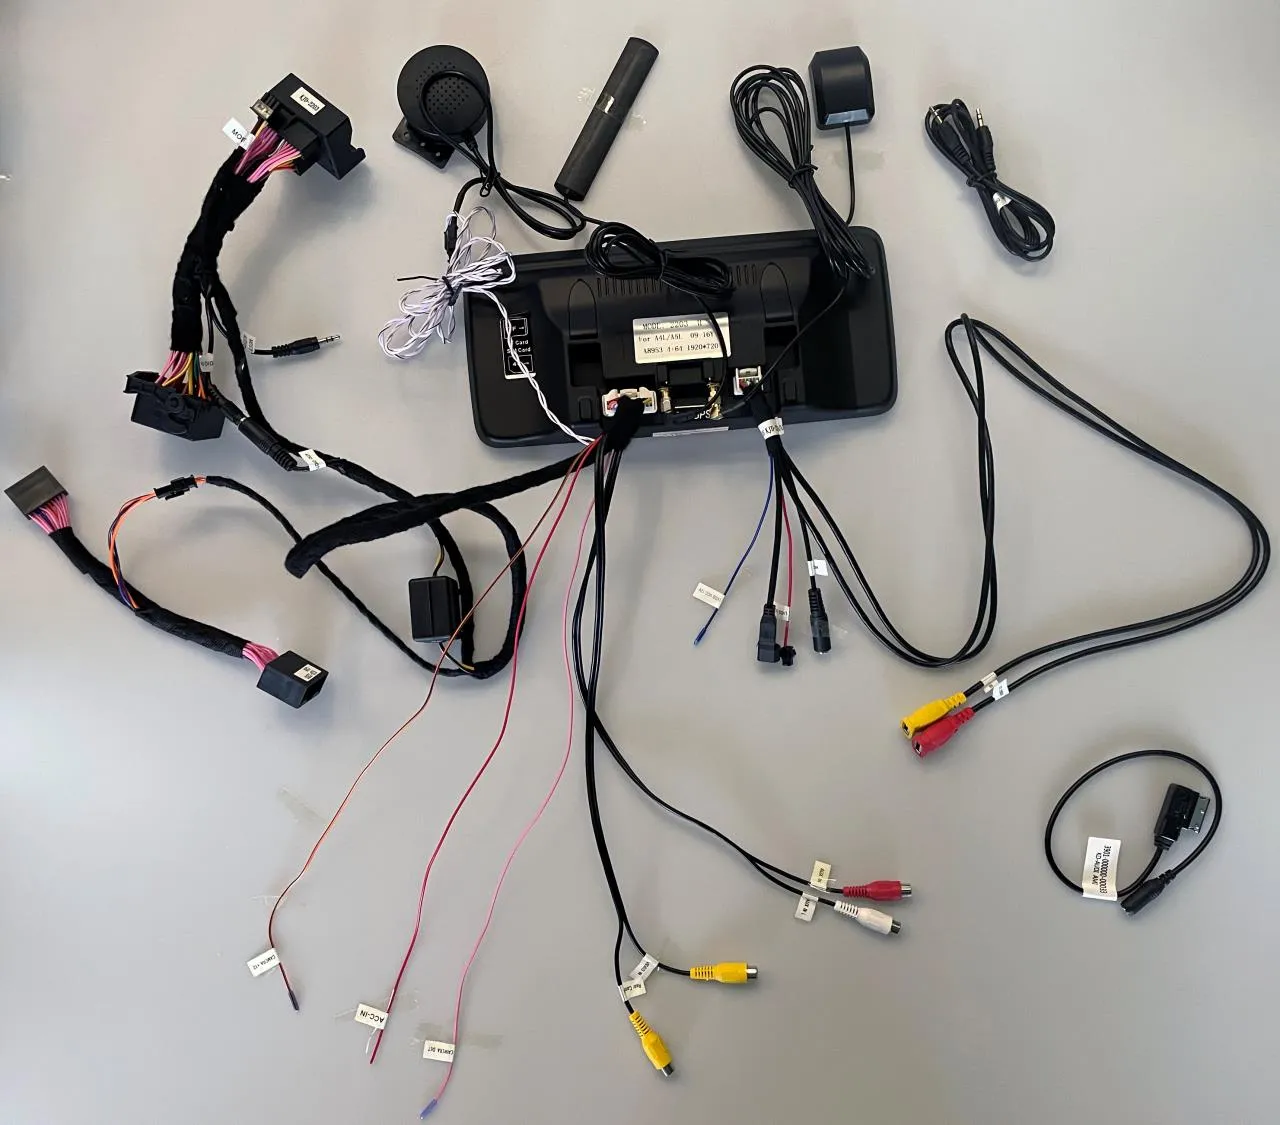
What’s Included With the Aftermarket Head Unit
This plug-and-play upgrade bundle typically includes:
-
10.25″ high-resolution capacitive touchscreen (optional 12.3″ upgrade available)
-
Android OS with built-in GPS navigation and Wi-Fi
-
Bluetooth (phone calls + audio streaming)
-
Apple CarPlay & Android Auto (wired and wireless options available)
-
USB & SD ports for media
-
Built-in and external GPS antenna
-
Camera input (RCA) and microphone
-
Plug-and-play wiring harness and CANBUS integration
-
Retains original FM/CD, MMI computer, and Audi info display
Important: This head unit replaces only the OEM LCD screen — the existing FM/CD head unit remains in place and functional.
Vehicle Compatibility
This upgrade fits the following models with left-hand or right-hand drive: sigmacarstereo.com
-
Audi A4 B8 (Type 8K): 2008–2016
-
Audi S4 B8 (Type 8K): 2009–2016
-
Audi RS4 B8: 2012–2015
Make sure to check your current dashboard radio display and system version before ordering. If unsure, take a photo and send it to the supplier for confirmation.
Compatibility Notes Before You Buy
-
Make sure your existing radio display is compatible — older MMI 2G basic systems may not fit.
-
If your car had no AUX input, you will likely need the AMI-AUX adapter for audio to output correctly.
-
If using the original joystick with the upgraded screen, note that touchscreen does not control the original MMI display.
Tools You’ll Need
-
Trim removal panel tools
-
Screwdriver set
-
Socket wrench set
-
Optional zip ties for tidy wiring
Step-by-Step Installation Guide


Installation video: https://youtu.be/4yijXT0Wdbw
Audi A4 high-quality system: https://www.youtube.com/watch?v=T8HNyO0N1NY
1. Safety First — Disconnect Battery
Always start by disconnecting the car battery to prevent electrical shorts during installation.
2. Remove Factory Trim and Display
Carefully use trim removal tools to detach the dashboard trim surrounding the factory screen and MMI controls. Be gentle to avoid damaging clips.
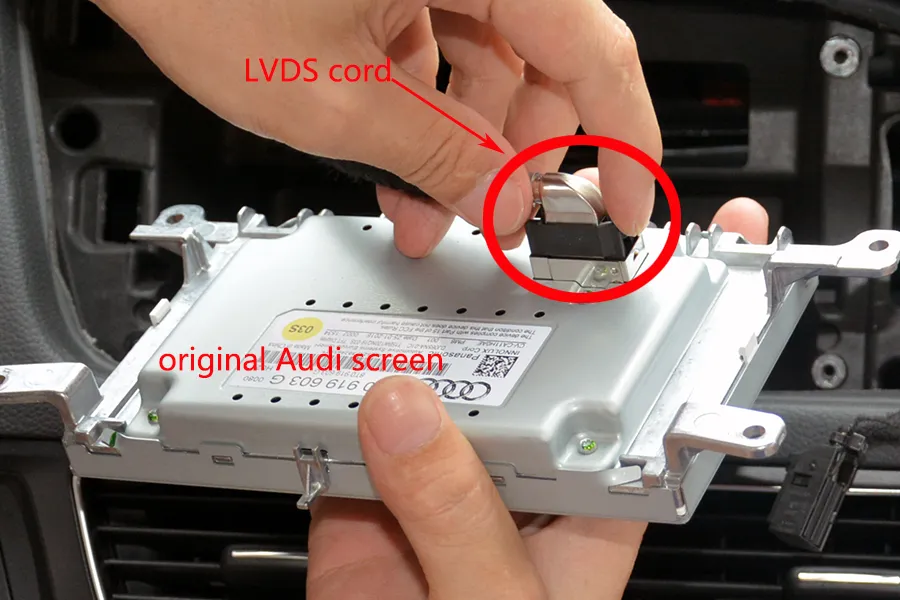
3. Uninstall OEM Head Unit
Remove mounting screws and pull out the OEM screen. Disconnect the LVDS cable and wiring harness from the back.
4. Connect Plug-and-Play Wiring Harness
Attach the new head unit’s plug-and-play harness to your car’s connectors. This unit uses the original Audi plugs and LVDS connector, so no cutting or splicing is needed.
? Tip: If your car has an AMI port instead of AUX, you’ll need the AMI-AUX adapter cord for audio to work correctly. sigmacarstereo.com
5. Install GPS Antenna & Accessories
Mount the GPS antenna where it can receive a clear signal (usually near the windshield). Connect the microphone and any optional add-ons, such as DAB+ dongles, wireless CarPlay modules, or OBD diagnostic adapters.
6. Power On & Test Before Final Fit
Reconnect the car battery and start the car. Test all functions:
✔ Apple CarPlay & Android Auto
✔ Navigation & GPS signal
✔ Bluetooth audio & phone
✔ Camera input (if installed)
✔ Steering wheel buttons (if supported)
7. Reinstall Trim & Finish Up
Once everything is tested and working, resecure the radio and reinstall the dashboard trim panels. Ensure all clips and screws are tight.
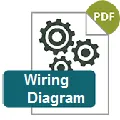
Installation Photo:
Switching Between Android and Original Audi Interface
To toggle between the new Android system and the original Audi interface:
-
Tap the “Original” icon on the home screen to return to OEM MMI.
-
Tap the screen again to go back to the Android interface.
Frequently Asked Questions (FAQs)
Is this product plug-and-play? Do I need to program or code my Audi? Do I need to buy an external GPS antenna? Can I still check the car info on the OEM screen?
Answer: Yes, it is totally plug-and-play, it has the same plugs and harness as the original Audi system. You do not need to program your car when installing. All necessary accessories are included in the package. You do not need to buy anything else to make it work. You can still check the original Audi car info as before.
How do I switch the new upgrade system to the original Audi interface?
Answer: Please tap the “Original” icon on the home screen to switch to the original Audi interface.
How do I switch the original Audi interface to the new upgrade system?
Answer: Please tap the screen.
Why it shows a black screen with no signal when tapping “Original” to switch back to the original Audi interface?
Answer: Please check the CAR-LVDS port. Make sure you connect the LVDS plug (removed from the OEM screen) to the new screen.

Why there is no audio from the new upgrade system?
Answer:
1. Please press the MEDIA button on the radio panel and check the audio source options. Make sure the External Audio input(AUX) is activated.

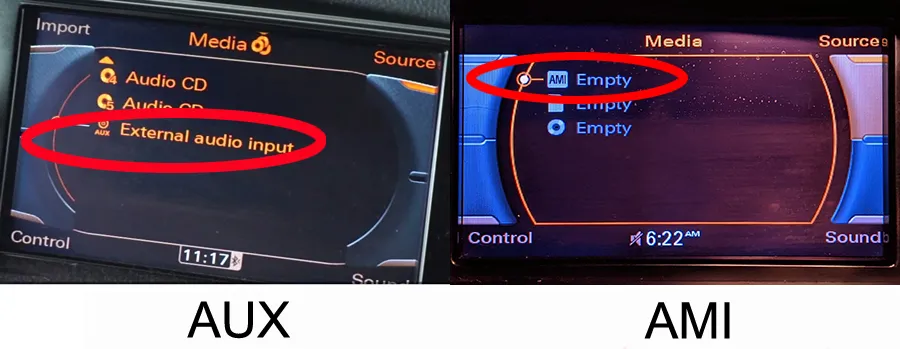
Note if your car has the AMI option instead of AUX, then you need to plug the Audi AMI-AUX cord(this cord is sold separately) into the AMI port in the glove box on the passenger side. After plugging this cord, the AMI will change to AUX on the screen.

2. Then tap the screen to access the new upgrade system. You should be able to hear sound.
Where should I mount the main metal box? The original LVDS cord is too short to mount in the glove box?
Please take apart the glove box on the passenger side and there is a hole that allows you to put the metal box hide behind the screen. Then the LVDS cord is long enough.

The T harness that plugs into the side behind the glovebox is not the right connection. photo here
Answer: Please check the attached wiring diagram here. Connect them to the CAN BUS plugs at the rear of the A/C controller panel.
I am getting TPM And and airbag error on my dash now, I assume it's due to that T harness not being plugged in.
Answer: You need to keep the original airbag/hazard button connected to the aftermarket T harness and hide it into the dash. Please check the attached picture here.
Lastly, I am not getting any audio when using CarPlay. Navigation and consoling my phone wirelessly works but no audio coming out of the speakers. It stays on the radio or CD player.
Answer: Please access the original AUDI menu and select the "AUX" audio option. Then try again.
Final Thoughts
Upgrading the infotainment in your Audi A4, S4, or RS4 B8 refreshes the cabin with modern technology — intuitive touchscreen, smartphone connectivity, navigation, and DAB digital radio. With plug-and-play installation and retained OEM features, it’s one of the best tech upgrades you can make for daily comfort and convenience.
Contact Us for Audi A4 S4 RS4 B8 Android Radio Upgrade
WhatsApp: https://api.whatsapp.com/send/?phone=00447591940624
Facebook: https://www.facebook.com/sigmacarstereo
Email: info@sigmacarstereo.com
Website: https://sigmacarstereo.com/
Need help choosing the right model or installation support? Contact us anytime—we’re happy to help!
Leave a Comment